

Learning how to hide desk cables without drilling is essential when working in a rental apartment where modifying furniture or baseboards is strictly prohibited. Securing a clean workspace requires relying on modular tension tools rather than permanent hardware.
While standard wire setups detailed by publications like Wirecutter often rely on screw-in raceways, renters need systems designed to elevate power strips and hide cords with zero surface damage. A clean desk setup should be built around tension clamps, non-marking silicone drops, and quick move-out portability.
How do you hide desk cables in a rental without drilling?
The core of a zero-drill rental cable setup is using clamp-on steel trays for heavy adapters, removable silicone drops for loose desktop leads, and zipper neoprene sleeves to consolidate hanging floor runs.
- Essential: Heavy-duty clamp tray, reusable velcro ties, and non-marking silicone cable drops.
- Strongly recommended: Flexible zipper neoprene sleeve for trailing leg drops.
- Zero damage: Rubber-buffered thumb clamps leave no indentations on wood veneer or composite desks.
Rental Cable Management Guide
- 1. The Rental Dilemma: Why Wood Screws Fail
- 2. The Foundation: Clamp-On Under-Desk Tray
- 3. Desktop Drops: Removable Silicone Clips
- 4. The Floor Run: Neoprene Zipper Sleeve
- 5. Slack Control: Reusable Hook-and-Loop Ties
- 6. Rental Hardware: Essential vs. Optional
- 7. Step-by-Step: How to Hide Desk Cables Without Drilling
- 8. What You Actually Need
- 9. Frequently Asked Questions
- 10. Final Verdict
1. The Rental Dilemma: Why Wood Screws Fail
Standard cable management kits assume you own the furniture and can drive pilot screws into the underside of the desktop. In a rental setup, this approach creates serious practical drawbacks.
Hollow composite or particleboard furniture crumbles easily under wood screw torque, stripping out permanently when holding heavy transformers. More importantly, visible screw punctures into landlord-supplied desks directly trigger repair deductions on move-out day.
2. The Foundation: Clamp-On Under-Desk Tray
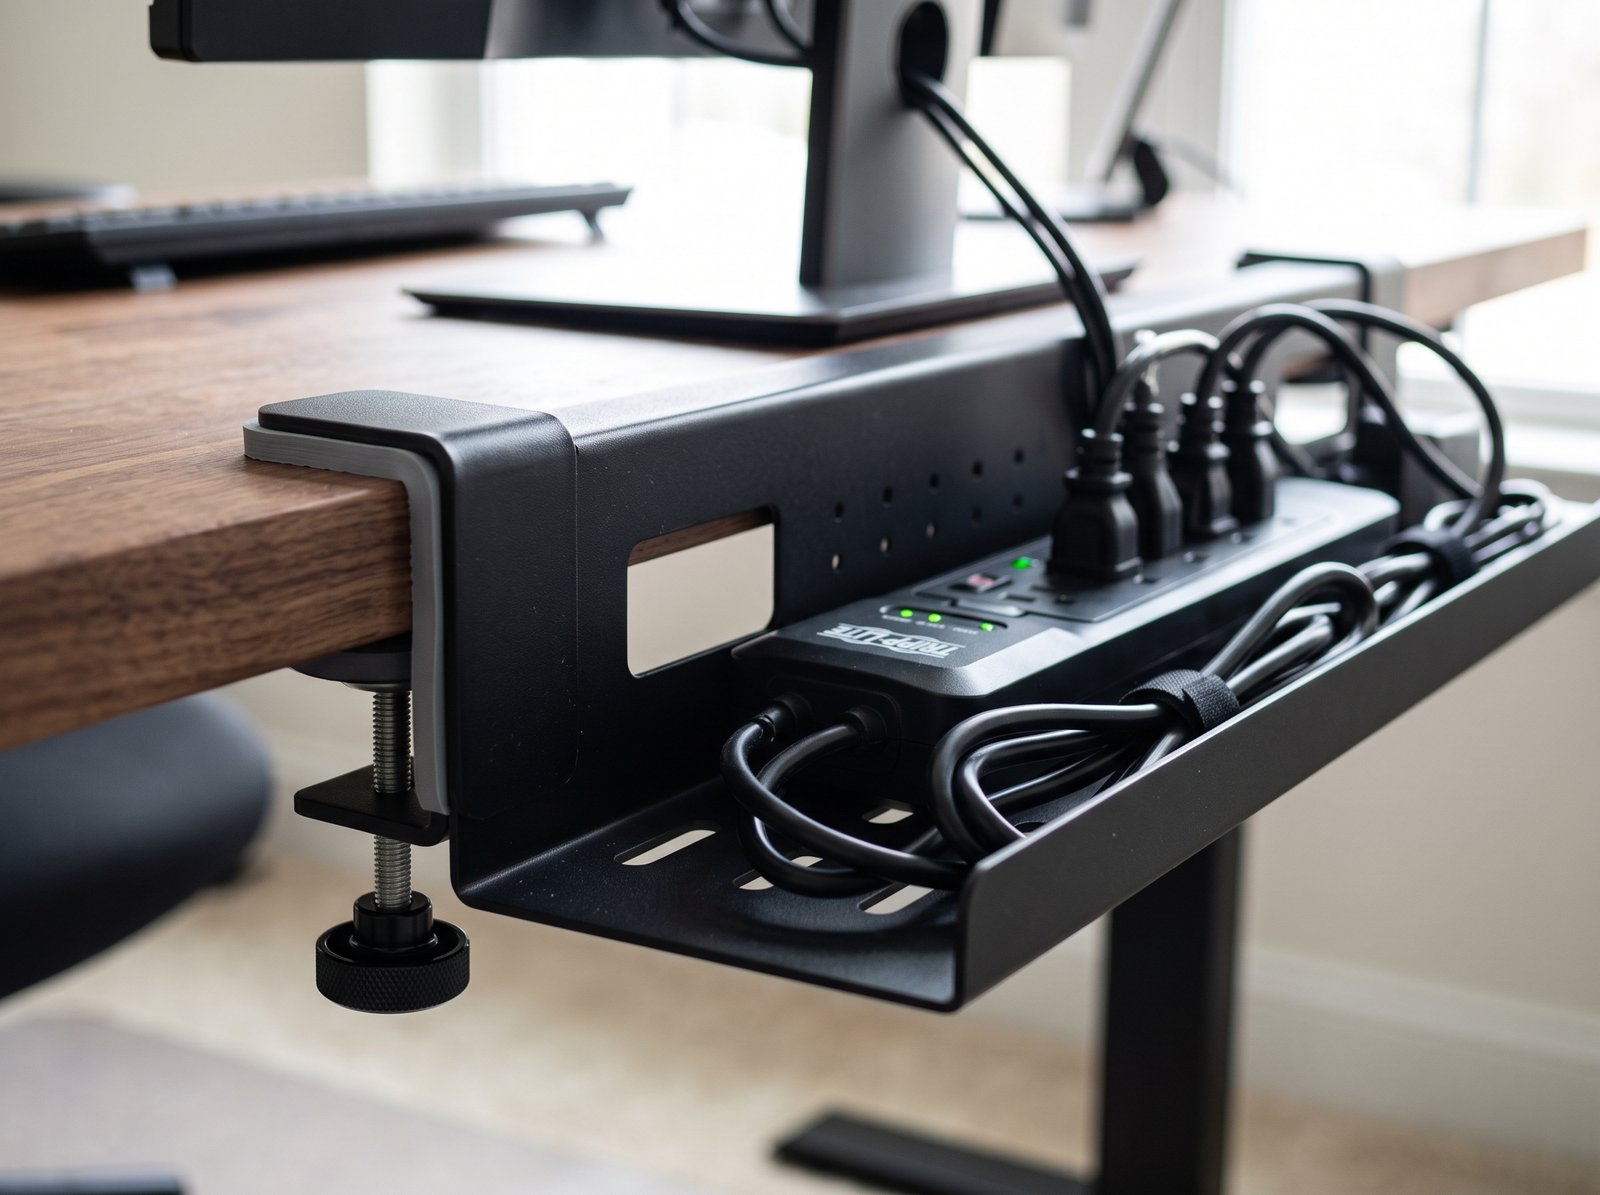
The heaviest clutter under any workspace comes from the multi-outlet power strip, desktop power supply bricks, and laptop chargers. A steel clamp tray secures to the rear lip of the table via padded thumb-screws without requiring any drill holes.
High-density silicone buffers on the clamps distribute pressure evenly, preventing scratches, dents, or finish stripping on wood veneer or laminate tops.
Clamp-On Under Desk Cable Management Tray
Heavy-duty steel construction with non-marring silicone clamp padding. Elevates heavy power strips and charging adapters off the floor without permanent hardware.
View Clamp Tray →3. Desktop Drops: Removable Silicone Clips

Loose charging cables for phones, tablets, and wireless peripherals frequently slip behind the furniture once unplugged. Silicone drops line your desk perimeter to hold cable ends in place at a convenient working height.
Unlike cheap adhesive foam pads that strip desk varnish, removable acrylic adhesive holds firmly to sealed wood or powder-coated frames and releases cleanly when needed.
Silicone Cable Clips & Cord Organizers
Modular non-scratch channels that hold peripheral charging tips at hand height. Releases cleanly when heated gently with a hairdryer during lease termination.
Explore Cord Drops →4. The Floor Run: Neoprene Zipper Sleeve
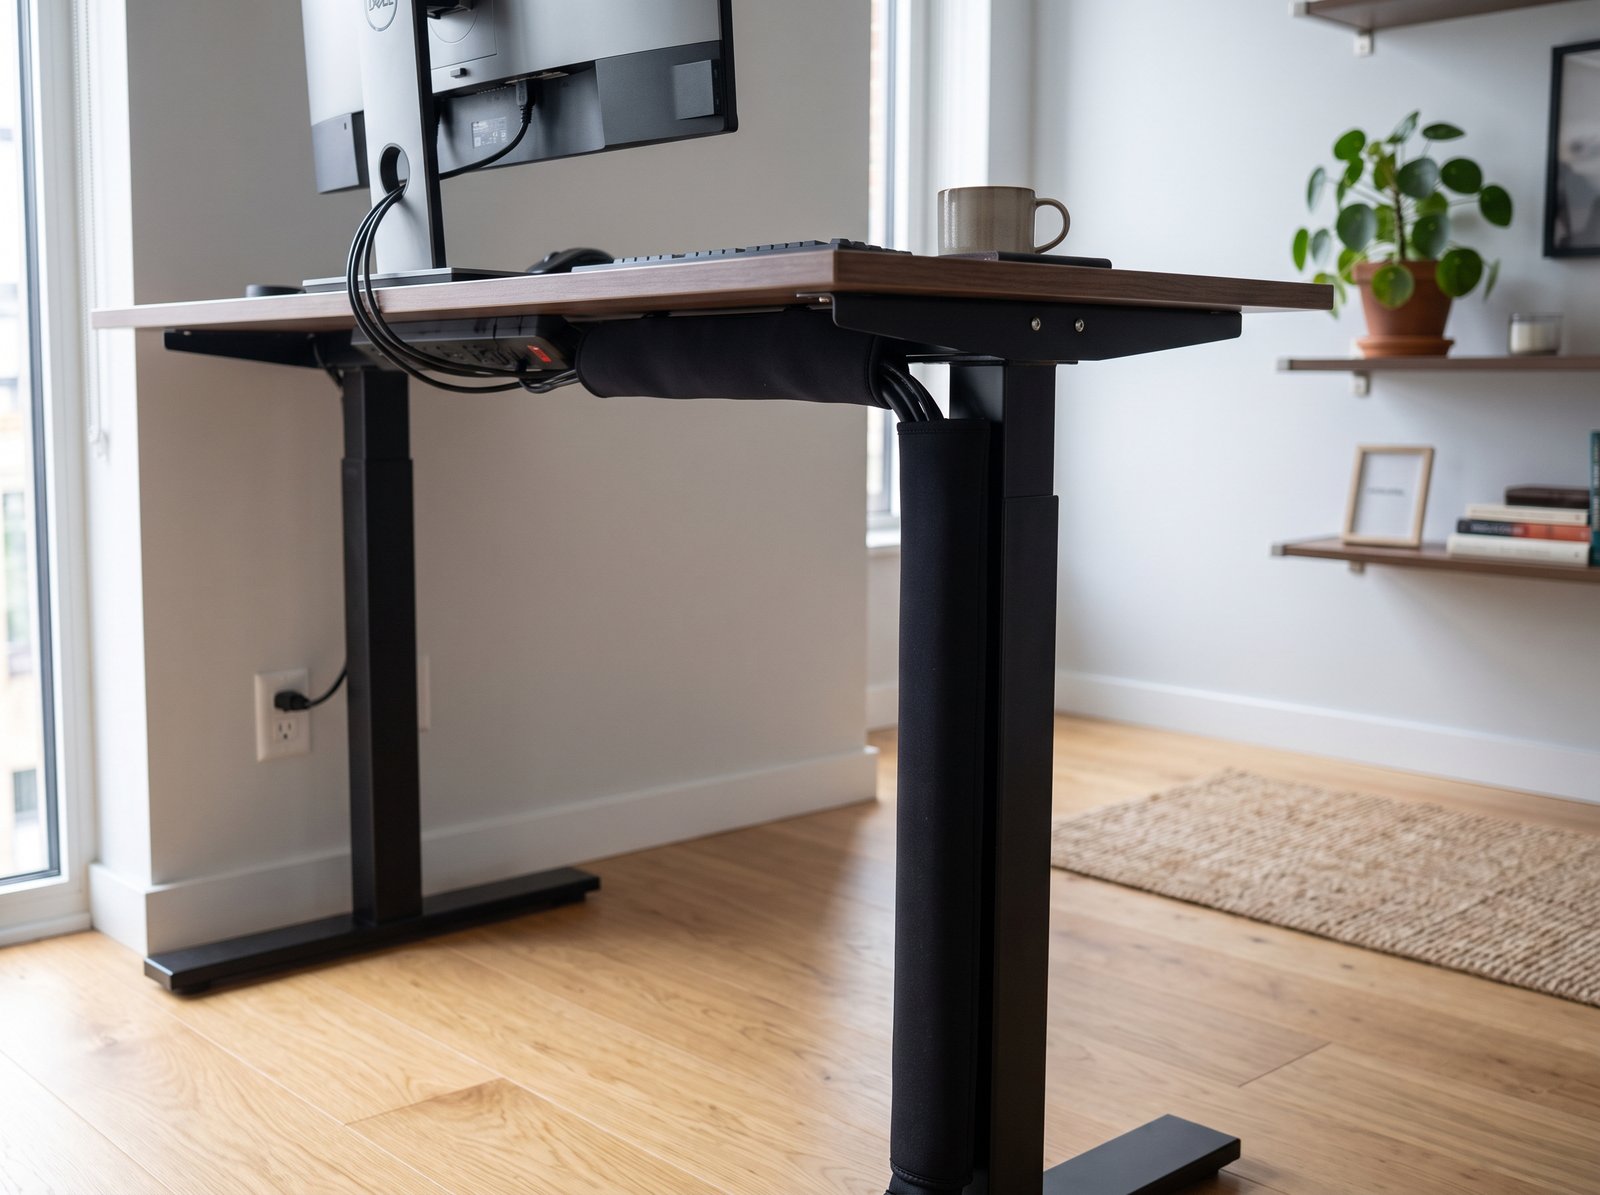
Even after lifting all equipment into your under-desk tray, main power leads and ethernet runs still need to descend toward the wall baseboard outlet. Dangling cords quickly ruin the look of an otherwise clean desk.
A zippered neoprene sleeve encloses multiple loose wires into a single solid column that can be routed cleanly down the backside of a rear desk leg without using wall adhesive.
Neoprene Zipper Cable Management Sleeve
Flexible fabric sleeve with a full-length zipper. Consolidates 4-6 hanging wires into a single uniform drop with zero wall or baseboard contact.
View Neoprene Sleeve →5. Slack Control: Reusable Hook-and-Loop Ties
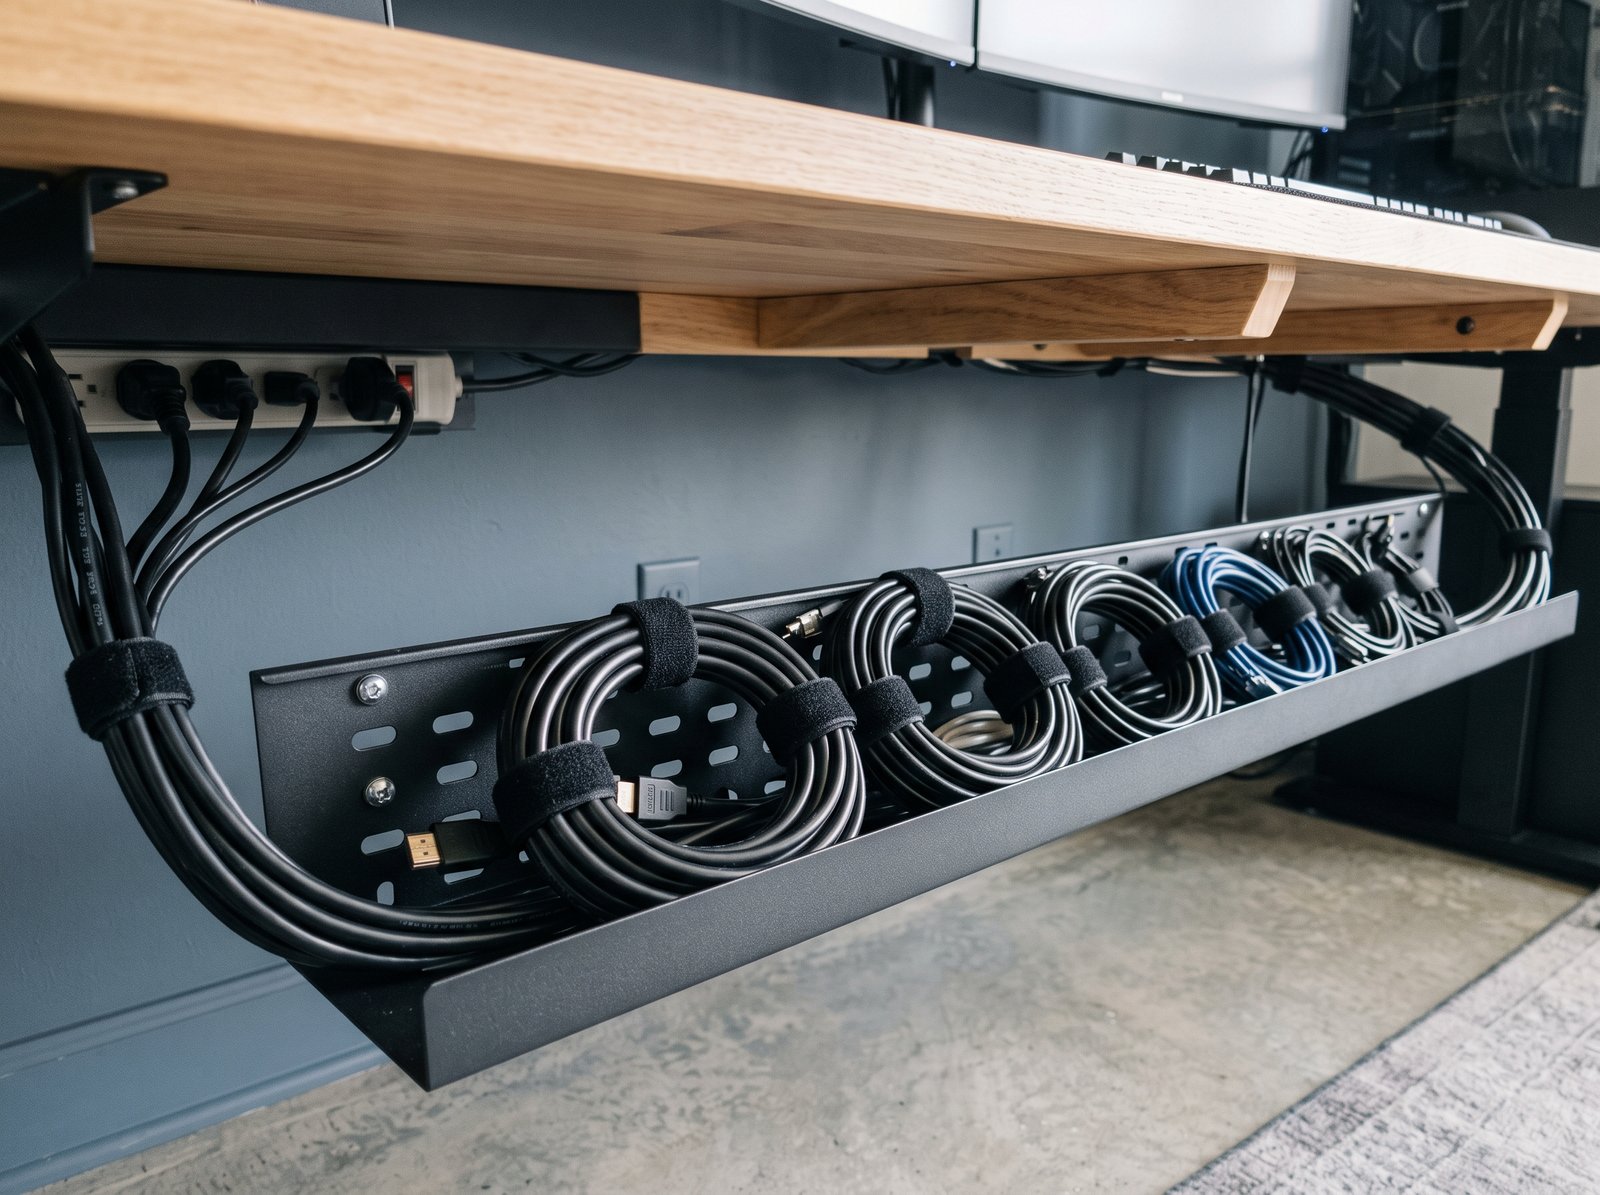
Excess wire length hanging below your tray basket creates visual clutter. Single-use plastic zip ties require wire cutters to remove, which poses a constant risk of slicing through electrical insulation.
Reusable hook-and-loop fabric ties allow you to coil and adjust long power cords cleanly inside your tray basket whenever you reconfigure peripheral equipment.
Reusable Hook and Loop Cable Straps
Essential reusable fabric wraps for bundling folded cable loops inside the tray basket without creating plastic waste.
Check Velcro Straps →6. Rental Hardware: Essential vs. Optional
You do not need an endless catalog of organizers. Use this comparison matrix to select the right mounting gear for your specific workspace layout.
| Hardware | Mount Style | Rental Safety | Why It Matters |
|---|---|---|---|
| Clamp-On Tray | Thumb C-Clamp | 100% (Rubber-buffered) | Lifts heavy multi-outlet bricks and power blocks completely off the floor. |
| Silicone Cable Drops | Acrylic Adhesive | Safe on sealed finishes | Keeps disconnected USB-C and laptop leads from falling behind furniture. |
| Neoprene Sleeve | Zipper Enclosure | 100% (Free-hanging) | Tames the exposed drop between desktop level and the lower wall outlet. |
| Hook-and-Loop Ties | Fabric Strap | 100% (Non-damaging) | Folds excess cord slack neatly inside the tray without cutting wire jackets. |
7. Step-by-Step: How to Hide Desk Cables Without Drilling
Building your setup in the correct sequence prevents tangles and saves you from disassembling components halfway through.
Slide the clamp assembly over the rear desk lip and hand-tighten until firm.
Place your surge protector and heaviest laptop charging bricks directly inside the basket.
Fold long peripheral lines into loops and lock them down using reusable velcro straps.
Stick silicone drops near your primary work zone to secure phone and laptop cables.
Enclose all descending power cords inside the neoprene sleeve and guide them down behind a rear desk leg.
8. What You Actually Need
A functional rental cable setup should prioritize quick installation and clean relocation rather than complicated permanent tracks.
You Probably Need
- One heavy-duty clamp-on steel wire tray
- Pack of reusable hook-and-loop velcro wraps
- 2–3 non-marking silicone desk cable clips
- Single neoprene zipper sleeve for wall socket drop
- Surge protector with at least a 6ft heavy-duty cord
You May Not Need
- Screwed-in plastic J-channel desk raceways
- Single-use plastic nylon zip ties
- Wall-mounted adhesive plastic wire conduits
- Under-desk double-sided foam tape (melts under heat)
- Drill bits or custom grommet desktop cutting tools
9. Frequently Asked Questions
Will clamp trays leave pressure marks on the desktop finish?
Quality clamp trays include pre-applied rubber or high-density EVA foam pads on both brackets. Hand-tightening them creates zero finish indentation or veneer damage.
How do I remove adhesive clips during move-out without peeling wood stain?
Warm the acrylic adhesive base with a hairdryer on medium heat for 30 seconds. The adhesive bond softens immediately, allowing you to twist and lift the clip without pulling away paint or veneer.
What is the easiest way for how to hide desk cables without drilling on glass or metal tables?
For glass or solid frames without overhangs, attach adhesive-backed velcro channels to the desk legs or set a freestanding cable management box directly against the baseboard.
10. Final Verdict
A tidy workspace does not require permanent alterations or sacrificing your security deposit.
Focus on the essentials: lift your power source off the floor using a padded clamp tray, fold excess cord slack with reusable ties, and consolidate the wall drop with a zipper sleeve.
By focusing on tension mounts and non-marking adhesives, you keep your cords organized today while ensuring moving out remains quick and trouble-free.
More From The Few Picks
If you are building a complete workspace, you may also find these guides useful:
Product availability, pricing, and specifications can change over time. Check the retailer’s current product page for the latest information before purchasing. The Few Picks may earn a commission from qualifying purchases made through affiliate links.